One common area of confusion in the music recording world is Compression. In this article, I'll discuss compressors, compression, and my interesting and exciting experiences in the studio using it.
Universal Audio 1176LN Solid State Limiting Amplifier

Compression in the recording studio is one of the most valuable yet often misunderstood and overused tools in the studio. You wonder why your recording doesn't sound like more pro studio recordings. It just may be the lack of compression on some of your tracks. To get tracks that have an even level throughout, compression is often used.
So, what does audio compression do you ask? Well, there are many different aspects to compression, but to simplify it: Compressing an audio signal evens out the volume of the track. Ideally by tweaking the setting on your compressor you can make it sound as "transparent" as possible to the listener.
You can compress the audio signal at three different times (one to many) in the recording process. You can compress the signal as you are recording it live. You would do that by having a hardware compressor setup between your mic preamp and the input of your audio soundcard. Don't forget that if you are using the preamps that are built into the soundcard that you will need to have inserts or sends to be able to do this. The reason you would want to use a compressor here is because you can affect the signal before it actually gets recorded. The purpose is to optimize the audio signal for the recorder (probably your computer). You want to make sure all low volume parts actually have a strong enough level where they won't bring in noise later, and you also want to stop any loud "peaks" from overloading the recorder's input, which will ruin the track - especially in the digital world with ugly clicks and pops. You can decide to avoid compression here, if you are good at riding the gain or you have performers that understand how to position themselves with the mic. We'll discuss this technique in a later article.
The next place you can compress your audio is during the mix phase. Once you have a track recorded, you can then add compression. If you are doing all your recording with a computer, then you could use a digital compression plugin for instance. If you are doing analog recording, then you could run the track through a hardware compressor and record it back to tape. This is the phase I most often use a compressor. I'm not a big fan of using a compressor when doing the tracking if possible. I prefer to have the raw recording on the computer so I can then play with different compressors. If you compress on the way in, you are commited to that signal.
The last place you can compress the audio track is when you are doing the mixdown and/or the mastering. This means that you have all the tracks mixed down to one final track and you apply the effect to the entire mix. This is usually a good thing to have a mastering pro do - it can be delicate and hard for even the experienced engineer to do.. The goal is to increase the tracks overall volume and reduce pumping and volume difference between passages in the song. Over time CD's have been compressed more and more to make the tracks louder for the radio. This is something that most mastering engineers despise - it is something that has been brought about by record labels who want their track to sound louder compared to another CD's tracks. I'll discuss this in detail a later article.
So, how do we use compressors? There are a few things that you should know about when using a compressor. I'm not going to go too deep in detail. I really want you to get a compressor and play with it. I firmly believe you will never master compression unless you take the time to learn what works and what doesn't.
Click next below to go to page 2 of this article!
Check this out:
INPUT........To set the level in.
THRESHOLD........This sets how high the signal must reach before the compressor kicks in.
RATIO.......This sets how much compression is applied in ratio to the Db rise in signal level above the Threshold.
ATTACK.......This sets how fast the compressor kicks in once the Threshold has been breached.
DECAY........This sets how fast the compressor lets go, once the input signal has dropped back below the threshold.
LINK ......Links the two sides for stereo operation.
OUTPUT......Sets the output signal level.
You'll find those things on most compressors. Here is a little table someone emailed us with some setting you can play with for various source material:
| Sound | Attack | Release | Ratio | Hard/Soft | Gain reduction |
| Vocal | fast | 0.5 sec | 2:1 - 8:1 | soft | -3-8 db |
| Loud vocal | fast | 0.3 sec | 4:1 - 10:1 | hard | - 5-15 db |
| Acoustic Git'r | 5-10 ms | 0.5 sec | 5:1 - 10:1 | soft/hard | 5-15 db |
| Lecky Guitar | 2-5 ms | 0.5 sec | 8:1 - 10:1 | hard | 5-15 db |
| Kik & Snare | 1-3 ms | 0.2 sec | 5:1 - 10:1 | hard | 5-15 db |
| Bass | 1-10 ms | 0.5 sec | 4:1 - 12:1 | hard | 5-15 db |
| Mix | fast | 0.4 sec | 2:1 - 6:1 | soft | 2-10 db |
| General | fast | 0.5 sec | 5:1 | soft | 2-10 db |
Let me talk about some of my real world experiences in my studio recording bands and using compression. I often found myself recording hardcore types of bands. One experience sticks out in my head. The singer for this one metalcore band would sing at a medium level for some parts of the song and then immediately mix in loud screams. This picture reminds me of what I was dealing with:
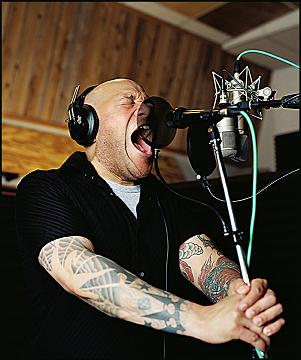
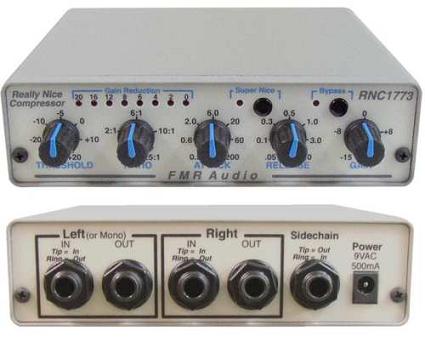
What better trick to use for this audio signal than compressing the vocal before it even hits the computer sound card? That's what I did using my handy FMR RNC comrpessor and it worked out great. Here's a picture of the FMR RNC compressor which is a great value:
Other sources that often need compression are the kick drum and the snare.
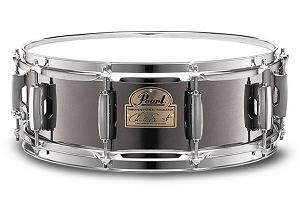
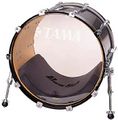
When recording a less experienced drummer who doesn't hit the snare with even amounts of pressure throughout a song, or even a drummer who plays the snare softly in some parts of a song and hard during heavier parts, compression can be your friend. You can loose a lot of valuable bits when recording the drum if you set your input level for the loudest snare hits, because when the drummer plays it softly throughout slow parts of the song, you are recording less information (bits) to the computer. That can stink and it will also make it so the drum may be hard to hear in some parts but loud in other parts. This can be fixed in two ways. You can compress on the way into the computer, or do it afterwards "in the box". Play around and see what you like. This technique is also usefuly for the kick drum, and especially double bass drum players who don't kick the drum with even pressure on each foot.
Another time of interest I HAD to use the compressor was when I recorded a Metal band. The bass player wasn't great and he didn't know how to properly slap a bass. So he beat the hell out of wacking it around. Then he would use his fingers and lay soft parts. Not going to work dude! This picture kind of captures the experience:

The only way I could keep the bass guitar track somewhat even was compressing before it hit the computer sound card. What really had to be done here was to teach the bass player how to properly play the bass, but that wasn't happening, so using the compressor was a godsend.
In conclusion, hopefully you have a better idea of what a compressor is and how to use it. The most important thing is that you go and play with it on your own. There is no wrong way to do something, so experiment and find out what you like. Let me know how it goes!
